With
the sword model completed in Maya my next step to UV unwrap it so I could
produce the ID map. I cut the edges along the mid-section of the blade so that
it would unfold with more ease. With the UVs unfolded and sorted, i took a snap
shot of them and took them to Photoshop to colour ID them.
The
next step was to take the low Polly, smooth it and send it to Z Brush where I
could the clean the model up and subdivide it. The subdivided model was
exported and made into an OBJ where I could put them both into Xnormal and gain
my normal maps.
Taking
my low poly, normal and ID maps, I put them into Quixel to apply my materials.
The
blade itself is comprised of a type of steel while the handle itself was a type
of dull black metal. The bolts I decided to make gold to add additional colour
variety. After toying with and
eventually choosing my materials I exported the project and prepared to import
it into Unreal 4.
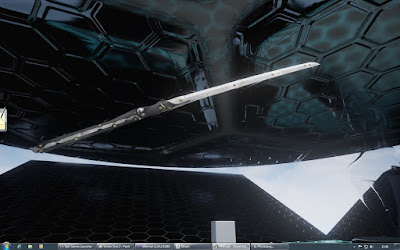
After Importing into unreal 4 I had to link the materials back to my model. created a scene and adjusted the lighting to further highlight
the materials slightly and added in bloom.


No comments:
Post a Comment